Showing posts with label ELF. Show all posts

Perfect Brow Kit

What do I use to fill in my brows?

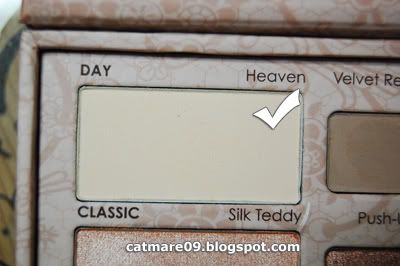
I used to be contented with just using my eyeliner for my brows. I wouldn't put much, just a bit to fill it in and then I'd smudge it so it wouldn't look too obvious. Then I tried using eyeshadows. I often use black eyeshadow, I know black wouldn't look good if you put too much so I just apply a little bit just to fill in the sparse areas. Sometimes I use NYX Rootbeer (but I feel that it's a bit brown for me so it's kind of obvious so I try adding a bit of black shadows so it wouldn't be too brown). I also use Sexpresso from my Too Faced Neutral Palette and I think the color is good for my brows. Not too black, not too brown... Then again, I still wanted to try a real brow kit. Months ago, I purchased ELF brow kit in Dark. But I was disappointed. I am NC40 and I felt that the color was kind of reddish when applied on my brow. Definitely not good. I felt it didn't look too natural on me. So yeah, I didn't even bother using it again. In case, you'd like to see here's a photo of my ELF browkit + swatch.


Disappointed with ELF, I went back to using my eyeshadows to fill in my brows. But of course, the search for the perfect brow kit isn't over.. So during my first visit to Etude House, I spotted this "Perfect Brow Kit". They actually had two brow kits, the other one was like ELF it was in wax/gel form. But I got this one instead. I think it costs around PHP 478.


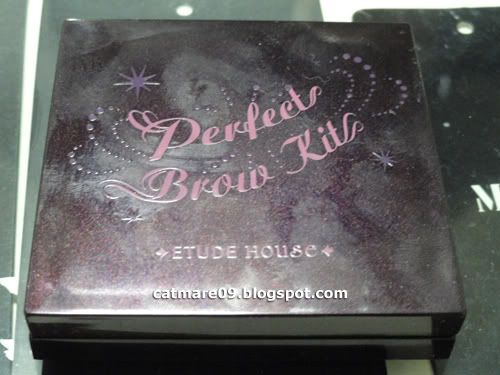
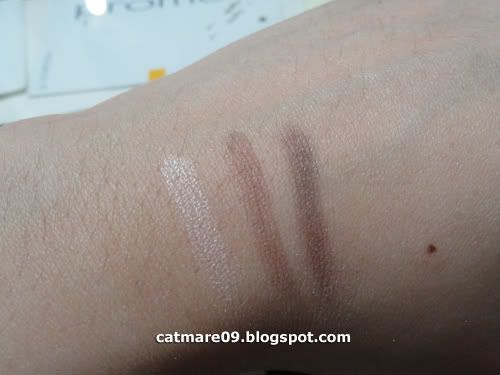
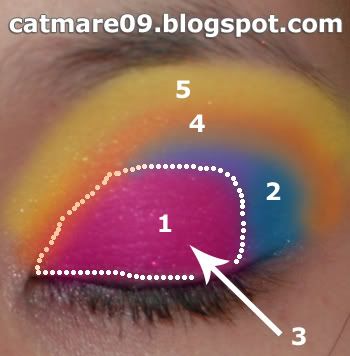
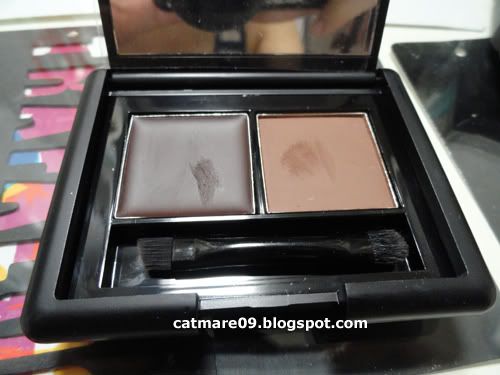
It has three shades. I suppose the light cream colored one is used as a highlight for the brow bone. I'm not quite sure what the middle shade (lighter brown color) is for. But what I have been using to fill in my brow is the 3rd dark brown color. And I am in love with it! It's the perfect color for me. Not too brown, not too black. Even if I put a lot, it wouldn't make me look like Bert from Sesame Street. It's just perfect. Definitely the right shade for me.

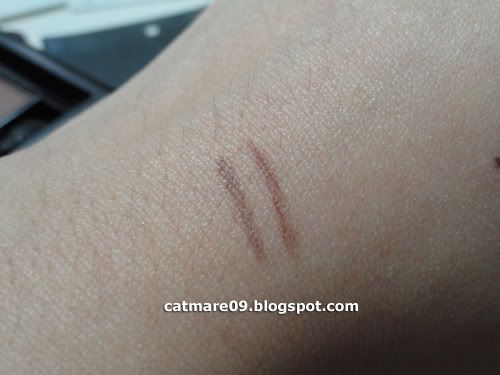
The packaging is also cute. It also comes with a brow brush and a double ended fluffy and angled brush. I personally wouldn't use the angled brush from the kit because I think it's too thick. It makes thick lines (as you can see from the above swatch) so it's quite difficult for me to maneuver it on my brows lol. Anyways, aside from that, I'm just really loving this kit.

I'm still clueless though about what the middle brown color is for. There's an instruction at the back of the box. But I have no idea what it means because I don't understand Korean. The saleslady told me that the first two shades are eyeshadows while the third one is the one used for the brows. I kind of doubt it because the drawing behind the box doesn't show anything being applied on the eyelid.

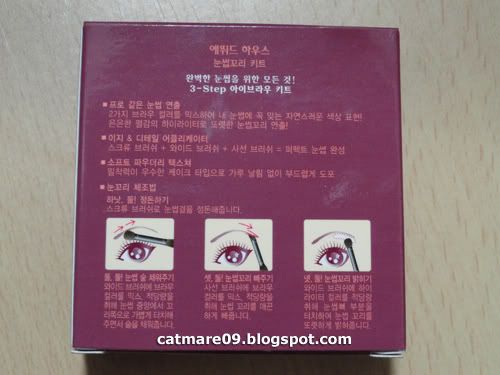
Anyone knows what the middle brown color is for? Or anyone understand these instructions? I'd def appreciate any input. Thanks in advance.

Rating: Very good kitty!

Review: ELF Blending Brush

This is going to be a short but sweet review about ELF's blending brush. I know most of you already know how good it is but I just can't help it. I still want to rave about it.

The picture above are both ELF blending brush. The one on top is the new blending brush that I just got. And the one below I think is the older version of their blending brush. So yeah, just by the look of it. The top brush (new version) looks so much softer and better than the one below (older version).

I don't even know why I bought that older version, maybe because I was too desperate that I needed something fluffy to blend in my shadows. But seriously, it's nothing close to being fluffy. It's too rough! Rougher than the watercolor brush I used in kindergarten. And it doesn't even blend.

So anyway, I am so glad to finally have the new version of their blending brush. It's super soft and it glides on so smoothly. And I really noticed how good it blends my shadows. It's so good that I think I'll be getting another one. =)

Rating: Very good kitty!

5 more days till Christmas!

My Attempt: Burgundy Plum Smokey Eyes

This is my first attempt to do an eye-makeup that is not neutral. I don't know if this is good enough. But I am quite happy with the result. =) The camera must've washed out the colors a bit because it didn't came out as vibrant as it's supposed to be. *sigh* But it's kinda close. Anyway here it is. Sorry if it's quite messy, I forgot to brush off the fallouts before taking a picture as I was in a hurry.


How I applied the eye makeup


After applying Too Faced Shadow insurance (eye primer), I applied a cream eyeshadow on my lid.

1.) I applied NYX eyeshadow in Burgundy Pearl on about 3/4 of my lid (starting from the inner corner) using my ELF eyeshadow brush.

2.) Using my fluffy NYX crease brush, I applied the deep dark plum shade from Loreal's HIP Duo in Sculpted on the outer part of my lid gently belnding it inwards and on my crease.

3.) Using the same brush and shade, I slightly dabbed the brush over the Burgundy Pearl color that I have applied on Step 1. Just to make the shade darker, but still leaving a hint of bright burgundy under it.

4.) Using my ELF blending brush, I applied the rosey plum color of Loreal's Hip Duo in Sculpted on the upper part of my crease blending it over the deep dark plum color I applied on Step 2.

5.) And for the highlight, I used my ELF blending brush and applied the color Heaven (matte cream) from the Too Faced Neutral Natural Eyeshadow Palette.

I applied some Maybelline Smooth & Vivid Eyeliner in Black on my upper and lower lashline. Then I curled my lashes and applied VMV Hypoallergenics Ooh-la-lash mascara.


Here are the brushes I used. Except for the crease brush, please ignore it. I didn't use it. I made a mistake in the pic, and I'm just too lazy to take another shot. lol.

So that's it. I would be very glad to receive comments or suggestions. I am new with the whole eyeshadow thing and I would love to learn from you guys. Thank you =)
Related Posts Plugin for WordPress, Blogger...